| Impacks |
|
| Impacks |
|
program names, file names
variable names
prompts, commands, program code
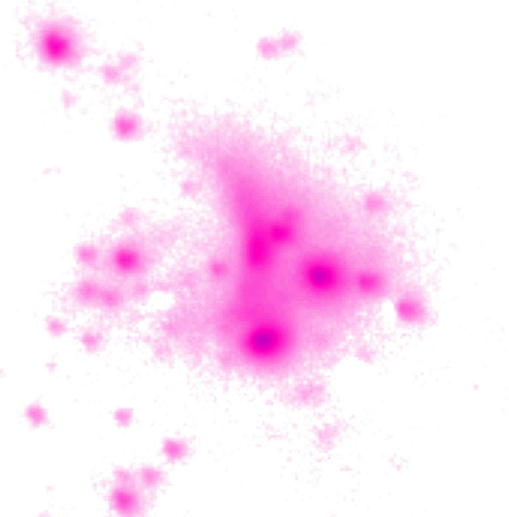
Image data (as we tend to deal with it) generally consists of (at least) three main components: (1) the image plane itself, which is a 2-D array of the intensity values for each of the detector array's individual light-sensitive elements (pixels); (2) the weight plane (also a 2-D array) which indicates the "goodness" of the image plane pixels (eg., a zero in the weight plane means that that pixel's counterpart in the image plane is somehow not usable); and (3) the header file, an array of character strings which provides a description of the image (here's an example of an image header).
Near the end of 1997 I got really sick of having several different variables associated with the same image data file (one for the image plane, one for the weight plane, another for the header file, etc). So I developed a way of keeping all that stuff together with a single variable name. The solution I came up with is a structure with pointers to the image (which may or may not have a weight plane) and to the header file, as well as fields which give information about the size of the image and the date and time at which the structure was created. I have taken to calling the structures "impacks" (image packages). It is basically a poor attempt at dealing with the data in an object-oriented fashion. If I had it to do again, I'd redevelop all this software with a more strict adherence to the concepts of object-oriented programming, with constructors, destructors, methods, inheritance, and all that jazz. But at this point, I'd just like to get on with my life.
Creating, using, and deleting impacks
Images are read into memory from FITS data files. FITS is a file storage format, as GIF and JPEG are file storage formats. The rfits function is used to read FITS files into impacks:
| IDLprompt> newimpack = rfits('dirname/filename.fits') |
Impacks can also be made from scratch. If you want to store an image, a header, and (maybe) a weight plane in a newly-created impack, you can do so with the imcre procedure. The following two commands create two impacks, impack1 and impack2, each of which contains the image imname and the FITS header hdrname:
| IDLprompt> imcre, impack1, imname, hdrname IDLprompt> imcre, impack2, imname, hdrname, wt = wtname |
Incidentally, impacks, as IDL structures, have a rather funny-looking description in the symbol table (eg., when you press F1): STRUCT -> ANONYMOUS ARRAY[1]. This just means that the impack is a single (ARRAY[1]) structure (STRUCT) which has the label of ANONYMOUS. Structures can actually be labelled, but this imposes certain restrictions about changing the elements of that structure, and so impacks are not labelled (not important).
The different elements in an impack may be accessed using the filter function by setting any of four mutually exclusive keywords, as illustrated by the following examples:
| IDLprompt> im1 = filter( impackname , /im ) IDLprompt> im2 = filter( impackname ) IDLprompt> h = filter( impackname , /hdr ) IDLprompt> weight = filter( impackname , /wt ) IDLprompt> stack = filter( impackname , /cube ) |
filter can also be used to check the validity of an impack or an array of several impacks (as mentioned above, a single impack is actually an array, with one element, of structures -- you could also have an array of several impacks, such as the output of the load_list procedure). The following command will return information about the image(s) in impackthingy, where impackthingy is a single impack or an array of several impacks:
| IDLprompt> info = filter( impackthingy , /diag ) |
Impacks may be saved (ie., written to disk) with the wfits procedure:
| IDLprompt> wfits, 'filename', impackname |
As mentioned previously, it's a good idea to delete variables after you've finished with with, especially big variables like images. However, AND THIS IS DAMN IMPORTANT, you mustn't use delvar to delete an image package until you've first run imdel. The reason for this is that the elements of an impack are pointers to images and headers, rather than the images and headers themselves. So if you run delvar on an impack, you'll delete the references to the data, but the data will still be locked up in memory. That data will then be unaccessable, and those memory addresses cannot become available again in that IDL session. If you want to delete an impack, make sure you do it in the following sequence:
| IDLprompt> imdel, impackname IDLprompt> delvar, impackname |
Annotative and arithmetic manipulation of impacks
Returning, for a moment, to the point of creating impacks, it's important for a FITS header to indicate any changes made to the image associated with that header. Most of the data reduction routines to be discussed in upcoming sections automatically alter the FITS headers of the images they alter, so that there is a record of everything that's been done to an image. But it's sometimes necessary to have fine control over the content of a FITS header. The head_edit procedure can be used to add lines of text to a FITS header file:
| IDLprompt> head_edit, oldheader, newheader, $ IDLprompt> add_message = 'blah, blah, blah' |
HISTORY 3 aug 00: blah, blah, blahThe nohist and nodate Boolean keywords may be used to suppress printing of the HISTORY tag or the date. The default length of a line in a FITS header file is 80 characters, so if the message is shorter than this length, it is padded with whitespace at the end to give the proper length. If the message is longer than the line length, head_edit attempts to break the entry into several lines of text. If a line length other than 80 characters is desired, this may be specified with the linelen keyword.
If you need to perform some arithmetic operation on either plane in an impack after the impack has been created, you can do that with the imarith procedure. imarith can be used to add, subtract, multiply, or divide a scalar number or a 2-D plane to, from, against, or into (respectively) either plane in an impack. If the operand is a 2-D plane, it must have the same dimensions as the image(s) in the impack. imarith automatically annotates the header to indicate the type of arithmetic function performed. The following command adds the scalar value 2. to every pixel in the image plane of impack (thus changing impack) and alters its header accordingly:
| IDLprompt> imarith, impack, 2., /add |
| IDLprompt> imarith, impack, im2D, /multiply, /wt, $ IDLprompt> headermessage = 'ANDed weight plane with bad pixel mask' |
Viewing images in IDL can be done with the v procedure. The first argument of v (a positional parameter) is the object you want to display. This can be a 2-D image, a 3-D image, an impack, or even (if the h keyword is set) a header file. v runs filter on the first argument to strip out the image.
The second parameter is optional; it's the magnification, which defaults to 2 (if no value is supplied as a second positional parameter in the call to v). The display window created at startup (by newwin) is approximately 550 screen pixels by 550 screen pixels, and is therefore large enough to display a 256x256 image array at a magnification of 2.
In displaying an image, it is necessary to set two parameters which will specify the display range. If, for example, you are running IDL with a black/white-linear color map, then the smallest pixel values (in the image array) appear on the screen as black, the largest pixel values look white, and intermediate values are linearly interpolated to various shades of gray. You need to tell IDL what two image values (ie., pixel values in the image array) correspond to the lower and upper ends of the display range. All image pixels with values lower than or equal to this minimum will appear black (in the black/white-linear color map), all image pixels with values larger than or equal to the maximum will appear white, and everything in between will be at an appropriate greyscale.
(If you try any of the following examples, you'll probably want to set the c keyword, as indicated. This will suppress a feature of v which we'll discuss in a moment.)
There are three ways to specify the display parameters in v. One way is to use the min and max keywords. If the minimum and maximum values you wanted mapped to the screen are 1000 and 5000, respectively, use the following command:
| IDLprompt> v, impackname, 2, min=1000, max=5000, /c |
The second way to specify the display range is with the mm keyword. This effectively sets min= -|mm| and max= |mm|, where the vertical bars indicate absolute value. The following command sets the display parameters to -300 and +300 (this time we'll omit the magnification, but it'll default to 2):
| IDLprompt> v, impackname, mm=300, /c |
The third way of setting the display parameters depends on the statistics of the image. By setting sig=5, you tell IDL to set the display parameters to five standard deviations above and below the mean, where the mean and standard deviation are the first and second moments of all the pixel values in the input image:
| IDLprompt> v, impackname, sig=5, /c |
Now we'll discuss a few of the other features of the viewing program v. The first was alluded to above in the parenthetical note reganrding the c keyword. If this keyword is not set, v remains active even after the image appears in the display window (ie., the IDL prompt won't return):
| IDLprompt> v, impackname, sig=5 |
v can also be run without giving an image or impack as the first positional parameter:
| IDLprompt> v |
Setting the h keyword tells v to run filter on the first positional parameter to look for a FITS header. If h is set, then the first positional parameter may be an impack or a direct reference to an array of character strings. v will then display the header in a GUI.
If a named variable is given as a third positional parameter (and in this case, the magnification must be explicitly given as the second positional parameter, even if the desired magnification is the default value of 2), v allows the user to draw a box over the image:
| IDLprompt> v, impackname, 2, box, sig=5 |
Setting the rec keyword lets you record the positions and values of individual pixels by clicking on them with the first mouse button. The coordinates and values will be written to the file ~/idlpro/disp.rec. This will continue until you click the third mouse button. Those pixel values and coordinates will remain in the file until the next time you run v with the rec keyword set. Setting the p keyword also prints these pixel coordinates and values to the command window (but only if rec is also set).
Setting the sam runs a bilinear interpolation routine to smoothe the image. This can make images (particularly if the magnification is more than 3 or so) look less pixelated.
See the documentation for v and view for more information.